


一、首先部署个本地向量数据库,这里使用milvus为例,本地创建一个docker-compose.yaml
version: '3.5'

services:
  etcd:
    container_name: milvus-etcd
    image: quay.io/coreos/etcd:v3.5.18
    environment:
      - ETCD_AUTO_COMPACTION_MODE=revision
      - ETCD_AUTO_COMPACTION_RETENTION=1000
      - ETCD_QUOTA_BACKEND_BYTES=4294967296
      - ETCD_SNAPSHOT_COUNT=50000
    volumes:
      - ${DOCKER_VOLUME_DIRECTORY:-.}/volumes/etcd:/etcd
    command: etcd -advertise-client-urls=http://127.0.0.1:2379 -listen-client-urls http://0.0.0.0:2379 --data-dir /etcd
    healthcheck:
      test: ["CMD", "etcdctl", "endpoint", "health"]
      interval: 30s
      timeout: 20s
      retries: 3

  minio:
    container_name: milvus-minio
    image: minio/minio:RELEASE.2023-03-20T20-16-18Z
    environment:
      MINIO_ACCESS_KEY: minioadmin
      MINIO_SECRET_KEY: minioadmin
    ports:
      - "9001:9001"
      - "9000:9000"
    volumes:
      - ${DOCKER_VOLUME_DIRECTORY:-.}/volumes/minio:/minio_data
    command: minio server /minio_data --console-address ":9001"
    healthcheck:
      test: ["CMD", "curl", "-f", "http://localhost:9000/minio/health/live"]
      interval: 30s
      timeout: 20s
      retries: 3

  standalone:
    container_name: milvus-standalone
    image: milvusdb/milvus:v2.5.5
    command: ["milvus", "run", "standalone"]
    security_opt:
    - seccomp:unconfined
    environment:
      ETCD_ENDPOINTS: etcd:2379
      MINIO_ADDRESS: minio:9000
    volumes:
      - ${DOCKER_VOLUME_DIRECTORY:-.}/volumes/milvus:/var/lib/milvus
    healthcheck:
      test: ["CMD", "curl", "-f", "http://localhost:9091/healthz"]
      interval: 30s
      start_period: 90s
      timeout: 20s
      retries: 3
    ports:
      - "19530:19530"
      - "9091:9091"
    depends_on:
      - "etcd"
      - "minio"

networks:
  default:
    name: milvus
通过docker-compose up -d 启动应用

在pycharm中创建项目,代码如下
from pymilvus import connections, FieldSchema, CollectionSchema, DataType, Collection, utility
from sentence_transformers import SentenceTransformer
import os

# 配置参数
MILVUS_HOST = "服务端地址"
MILVUS_PORT = "19530"
COLLECTION_NAME = "text_collection"
DIMENSION = 384  # 模型向量维度(根据模型调整)
BATCH_SIZE = 128  # 批量插入大小
TEXT_FILE_PATH = "test.txt"  # 替换为你的文本文件路径
grpc_options = {
    "grpc.max_send_message_length": 100 * 1024 * 1024 * 100,  # 100MB
    "grpc.max_receive_message_length": 100 * 1024 * 1024 * 100,  # 100MB
}

# 1. 连接 Milvus
connections.connect(host=MILVUS_HOST, port=MILVUS_PORT,grpc_options=grpc_options)


# 2. 创建 Collection
def create_collection():
    if utility.has_collection(COLLECTION_NAME):
        utility.drop_collection(COLLECTION_NAME)

    fields = [
        FieldSchema(name="id", dtype=DataType.INT64, is_primary=True, auto_id=True),
        FieldSchema(name="text", dtype=DataType.VARCHAR, max_length=50000),
        FieldSchema(name="embedding", dtype=DataType.FLOAT_VECTOR, dim=DIMENSION)
    ]
    schema = CollectionSchema(fields, description="Text collection with embeddings")
    collection = Collection(name=COLLECTION_NAME, schema=schema)

    # 创建索引
    index_params = {
        "index_type": "IVF_FLAT",
        "metric_type": "L2",
        "params": {"nlist": 128}
    }
    collection.create_index("embedding", index_params)
    return collection


# 3. 加载文本并生成向量
def process_text(file_path):
    # 读取文本文件
    with open(file_path, 'r', encoding='utf-8') as f:
        texts = [line.strip() for line in f if line.strip()]

    # 初始化模型(这里使用小型 sentence-BERT 模型)
    model = SentenceTransformer('all-MiniLM-L6-v2')

    # 批量生成向量
    embeddings = model.encode(texts, batch_size=BATCH_SIZE, show_progress_bar=True)
    return texts, embeddings


# 4. 插入数据到 Milvus
def insert_data(collection, texts, embeddings,batch_size=1000):
    total = len(texts)
    for start in range(0, total, batch_size):
        end = min(start + batch_size, total)
        batch_texts = texts[start:end]
        # 如果 embeddings 是 numpy 数组,则转换为列表格式
        batch_embeddings = embeddings[start:end].tolist()

        entities = [
            batch_texts,
            batch_embeddings
        ]
        insert_result = collection.insert(entities)
        collection.flush()  # 确保数据持久化
        print(f"Inserted records from {start} to {end - 1}")


def search_similar(collection, query_text, top_k=5):
    # 向量化查询文本
    model = SentenceTransformer('paraphrase-multilingual-mpnet-base-v2')
    query_embedding = model.encode([query_text]).tolist()

    # 配置搜索参数
    search_params = {"metric_type": "L2", "params": {"nprobe": 10}}

    # 执行搜索
    results = collection.search(
        data=query_embedding,
        anns_field="embedding",
        param=search_params,
        limit=top_k,
        output_fields=["text"]  # 返回原始文本
    )

    # 解析结果
    for hits in results:
        for hit in hits:
            print(f"ID: {hit.id}, Distance: {hit.distance}, Text: {hit.entity.get('text')}")


# 使用示例

def query():
    query_text = "vCenter Server主要作用"
    # collection = create_collection()
    model = SentenceTransformer('all-MiniLM-L6-v2')
    collection = Collection("text_collection")
    collection.load()  # 确保数据加载到内存
    uery_text = "需要查询的关键词或句子"
    query_vector = model.encode([query_text]).tolist()  # 转换为列表格式

    # 执行搜索
    search_params = {
        "metric_type": "L2",  # 需与索引的 metric_type 一致
        "params": {"nprobe": 32}  # 调整 nprobe 平衡精度与速度
    }

    results = collection.search(
        data=query_vector,
        anns_field="embedding",  # 指定向量字段名
        param=search_params,
        limit=5,  # 返回前5条结果
        output_fields=["text"]  # 同时返回原始文本字段
    )

    # 解析结果
    for hits in results:
        print(f"找到 {len(hits)} 条相关记录:")
        for hit in hits:
            print(f"""
                ID: {hit.id}
                相似距离: {hit.distance:.4f}
                文本内容: {hit.entity.get('text')}
                """)

def create_collection():
    collection = create_collection()

    # 处理文本数据
    texts, embeddings = process_text(TEXT_FILE_PATH)

    # 插入数据
    insert_data(collection, texts, embeddings)

    # 验证数据量
    print("Total entities:", collection.num_entities)
# 主流程
if __name__ == "__main__":
    query()
其中,文本内容如下
以下是关于 vCenter 的详细概念说明:

---

### 1. 基本概念

**vCenter Server** 是 VMware 虚拟化平台 vSphere 的核心管理组件,它提供了一个集中式的管理界面,用于管理整个虚拟化环境中的所有资源,包括 ESXi 主机、虚拟机、存储和网络等。vCenter 通过一个统一的控制台,简化了对大规模数据中心的管理工作,使管理员能够从单一位置监控和配置所有虚拟化资源。

---

### 2. 主要功能

- **集中管理**
  vCenter 允许管理员在单一平台上统一管理所有 ESXi 主机和虚拟机,无需逐台主机登录,极大地提升了管理效率。

- **资源调度与优化**
  - **Distributed Resource Scheduler (DRS):** 根据资源利用率和工作负载,自动平衡主机之间的负载,优化资源分配。
  - **Storage DRS:** 在存储资源之间进行负载均衡,确保存储性能和容量的合理分配。
  - **vMotion:** 支持虚拟机在 ESXi 主机之间的实时迁移,无需停机,从而实现无缝的维护和负载均衡。

- **高可用性和灾备**
  - **vSphere High Availability (HA):** 当某台 ESXi 主机发生故障时,自动重启受影响的虚拟机到其他主机上运行。
  - **Fault Tolerance (FT):** 为关键任务的虚拟机提供无停机时间的故障保护,确保在硬件故障时业务不中断。

- **性能监控与报告**
  内置的监控工具能够实时追踪虚拟机和主机的性能指标(如 CPU、内存、网络、存储使用率),并生成详细的报告,帮助管理员及时发现和解决问题。

- **备份与恢复管理**
  虽然 vCenter 本身不直接负责备份,但它提供了与各种备份解决方案的集成接口,便于虚拟机数据的定期备份和快速恢复。

---

### 3. 架构和部署

- **部署形式**
  vCenter Server 可以部署为基于 Windows 的应用程序或作为预配置的虚拟设备(vCenter Server Appliance, VCSA),后者在性能、维护和安全性方面通常具有更好的表现。

- **组件结构**
  - **vCenter Server:** 核心服务,负责管理和调度所有虚拟化资源。
  - **vSphere Client:** 用户通过它连接到 vCenter,以图形化界面管理虚拟化环境。
  - **其他支持组件:** 包括 Single Sign-On (SSO)、Web 服务、数据库服务等,确保整个系统的高效协同工作。

---

### 4. 应用场景与优势

- **数据中心管理**
  在企业级数据中心中,vCenter 能够帮助管理员高效管理数十到数百台 ESXi 主机和成千上万的虚拟机。

- **云计算平台建设**
  通过集中资源管理和自动化调度,vCenter 为私有云和混合云平台提供了坚实的基础。

- **高可用性和业务连续性**
  利用 HA、vMotion 等特性,vCenter 能够在硬件故障或维护期间实现业务的无缝迁移和快速恢复,确保系统连续运行。

- **资源优化与成本控制**
  自动化的资源调度和性能监控帮助企业合理分配资源,避免资源浪费,同时提升整体系统性能和利用率。

---

### 总结

vCenter 是 VMware 虚拟化架构中的核心组件,凭借其集中管理、自动化资源调度和高可用性支持,为大规模虚拟化环境提供了高效、可靠的管理平台。无论是在数据中心运营、云平台建设还是业务连续性保障方面,vCenter 都发挥着至关重要的作用,帮助企业实现 IT 基础设施的优化和成本控制。

---

这种集中管理和智能调度的能力,使 vCenter 成为现代 IT 环境中不可或缺的管理工具,为企业带来更高的运维效率和业务连续性保障。
运行代码,将文本数据写入向量数据库中
if __name__ == "__main__":
    create_collection()
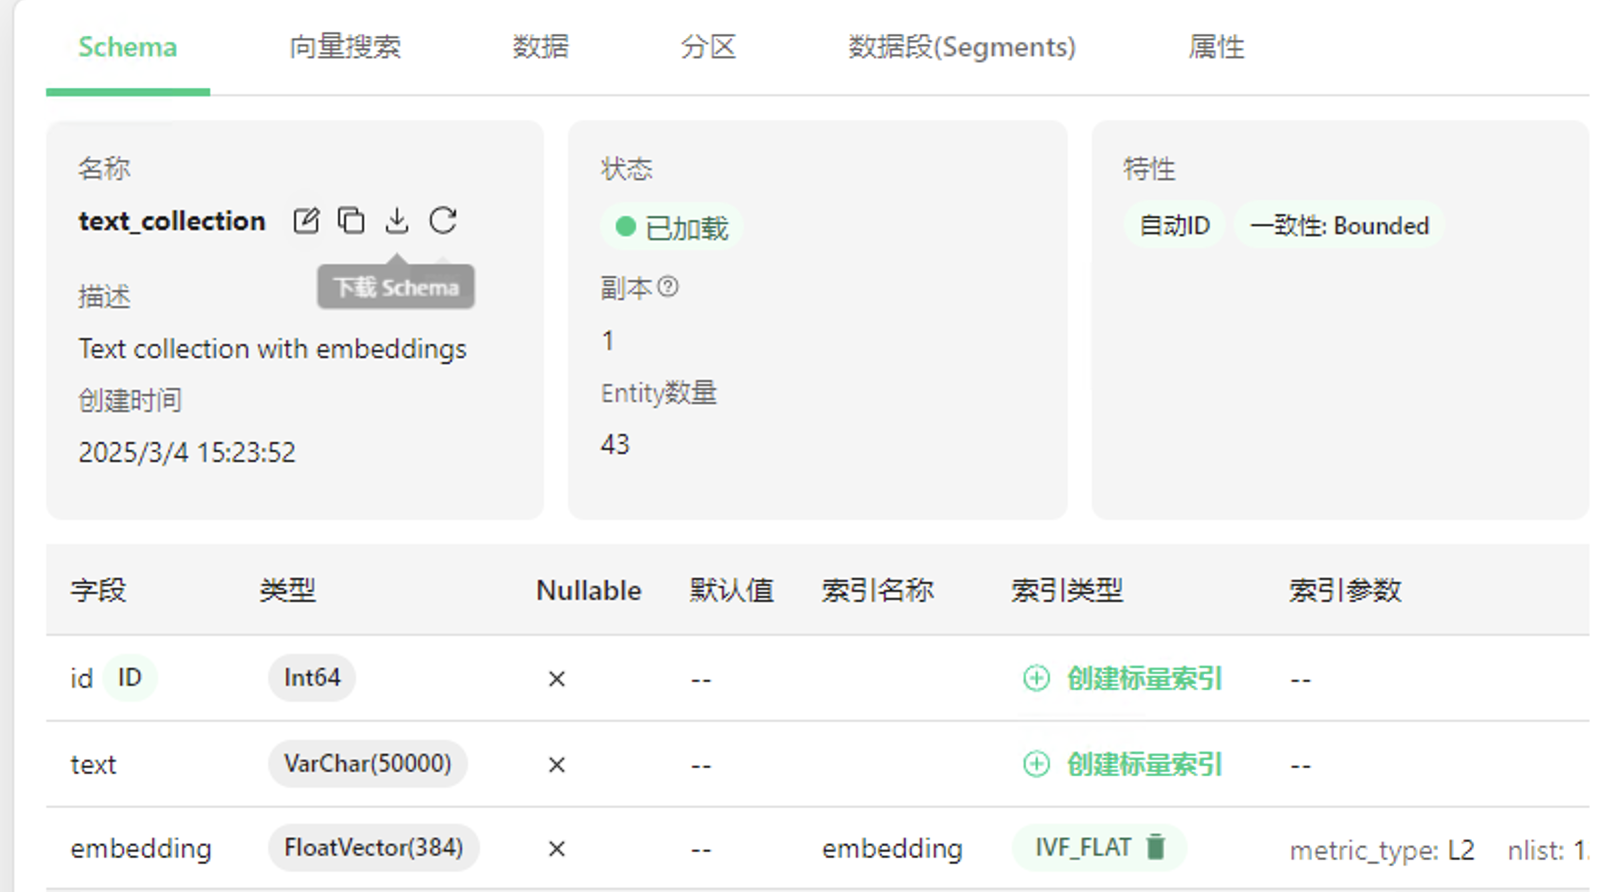
通过客户端查看已经写入
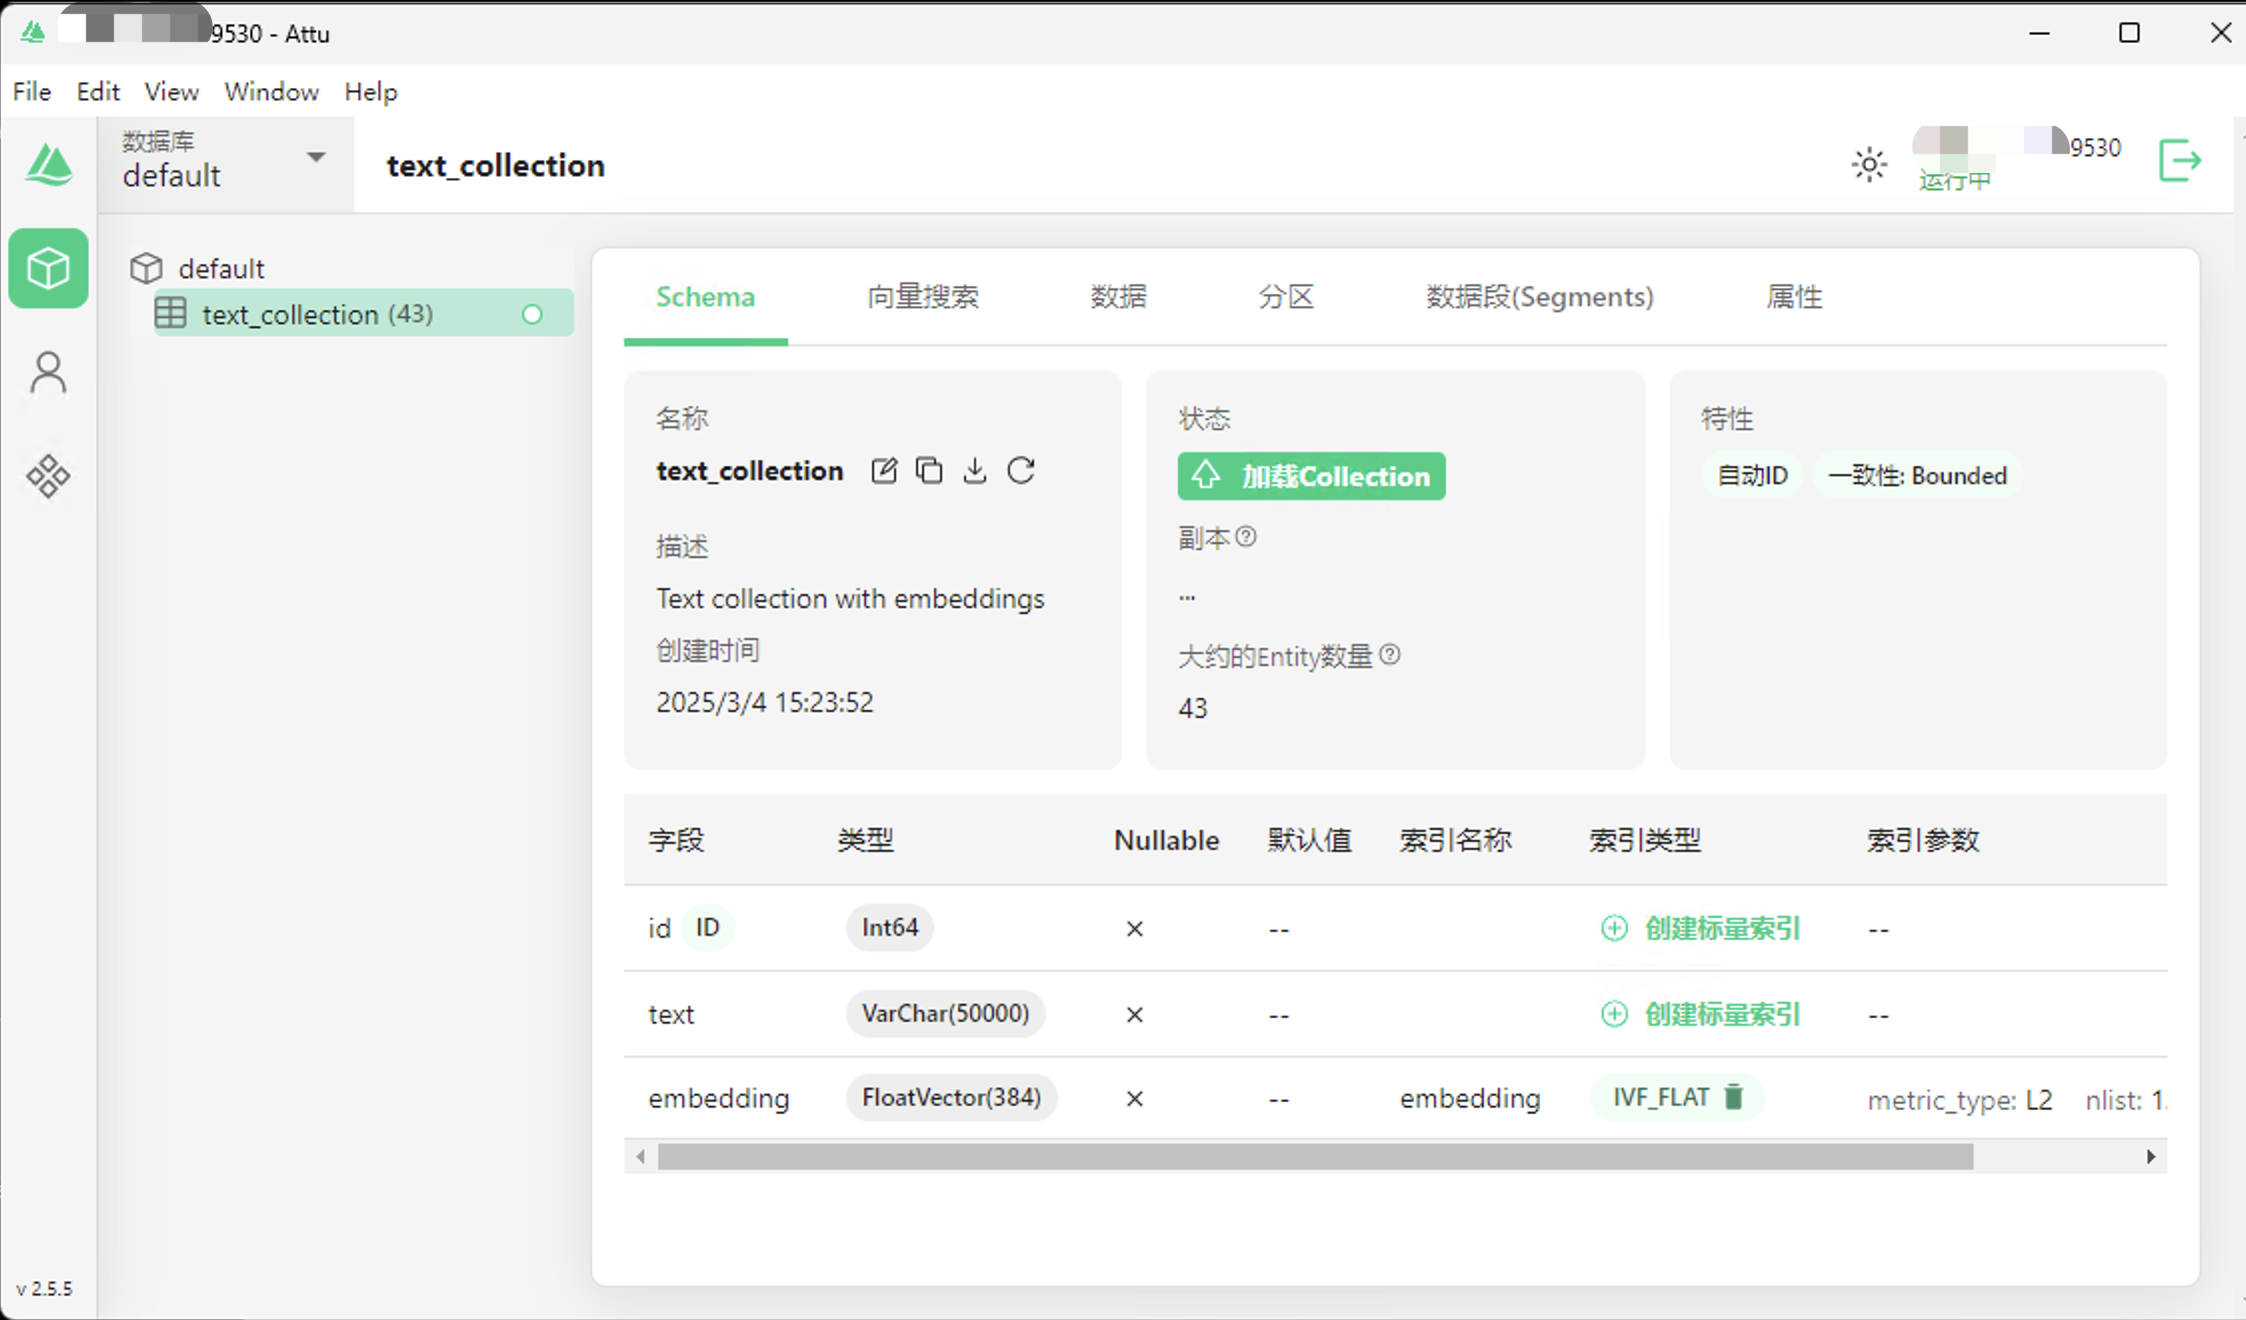
点击加载Collection按钮

执行查询语句
if __name__ == "__main__":
    # create_collection()
    query()
结果如下,后续可以使用其他模型进行优化
找到 5 条相关记录:

                ID: 456388602814760353

                相似距离: 0.2757

                文本内容: - vCenter Server: 核心服务,负责管理和调度所有虚拟化资源。


                ID: 456388602814760351

                相似距离: 0.3191

                文本内容: vCenter Server 可以部署为基于 Windows 的应用程序或作为预配置的虚拟设备(vCenter Server Appliance, VCSA),后者在性能、维护和安全性方面通常具有更好的表现。


                ID: 456388602814760332

                相似距离: 0.3611

                文本内容: vCenter Server 是 VMware 虚拟化平台 vSphere 的核心管理组件,它提供了一个集中式的管理界面,用于管理整个虚拟化环境中的所有资源,包括 ESXi 主机、虚拟机、存储和网络等。vCenter 通过一个统一的控制台,简化了对大规模数据中心的管理工作,使管理员能够从单一位置监控和配置所有虚拟化资源。


                ID: 456388602814760368

                相似距离: 0.4737

                文本内容: vCenter 是 VMware 虚拟化架构中的核心组件,凭借其集中管理、自动化资源调度和高可用性支持,为大规模虚拟化环境提供了高效、可靠的管理平台。无论是在数据中心运营、云平台建设还是业务连续性保障方面,vCenter 都发挥着至关重要的作用,帮助企业实现 IT 基础设施的优化和成本控制。


                ID: 456388602814760354

                相似距离: 0.4896

                文本内容: - vSphere Client: 用户通过它连接到 vCenter,以图形化界面管理虚拟化环境。
评论区